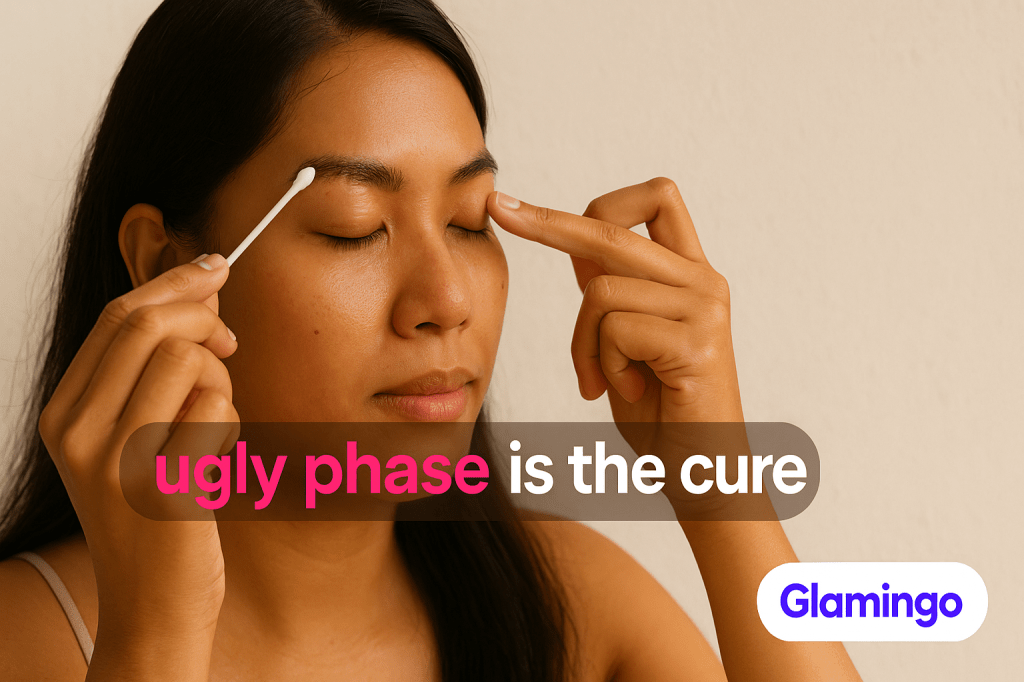
You walked out of the salon feeling unsure — the colour was too dark, maybe the shape looked off, and by day four there were flakes. If you immediately panicked and Googled “brow embroidery gone wrong,” you are in very good company. What nobody explains clearly enough beforehand is that the ugly phase is not a sign something went wrong — it is the exact biological process that determines whether your brows last.
Here is the thing: most people who get brow embroidery go in knowing roughly what the treatment involves, but have no real mental map of what healing actually looks like day by day. So when the darkness hits, then the tightness, then the flaking, then the alarming colour loss — it reads like a series of disasters rather than a single, predictable sequence. Understanding what your skin is doing underneath those flakes changes everything about how you manage the healing window. And in Singapore’s heat, with humidity sitting around 80% year-round, getting that management right matters more than most salons bother to explain.
What brow embroidery actually does to your skin (before we talk about what it does to your brows)
The micro-wound mechanics — why pigment delivery and wound response happen simultaneously
Brow embroidery works by depositing pigment into the upper layers of the skin just below the surface — the dermis — using fine needle strokes that create tiny, repeated micro-injuries. The needle opens a channel, the pigment is pressed in, and the channel closes. This is happening dozens or hundreds of times across your brow area in a single session. It is a controlled wounding process, and your skin responds to it exactly the way it responds to any wound: with inflammation, repair, and eventually, closure.
That sequence — wound, inflame, repair, close — is not a side effect of the treatment. It is the treatment. The pigment only stays if the skin heals around it correctly. Which means everything you do during the healing window is either helping that process or working against it.
Why the skin treats embroidery pigment the same way it treats any foreign material
Your immune system does not make aesthetic judgments. The moment pigment particles land in the dermis, the body flags them as foreign material and sends in its standard response: white blood cells arrive to assess the situation, the area swells slightly, and the top layer of skin begins working to seal the wound. Some pigment gets expelled in this process. Some gets encapsulated by the surrounding tissue and stays. The ratio of expelled to retained pigment is what determines your final result — and it is influenced by both your biology and your aftercare.
Think of it like grouting new tiles. The grout (pigment) is pressed into the gaps, but before it sets, some of it smears across the surface and looks messy. As it cures, the surface layer gets wiped away — and it looks like you have lost most of the colour. What remains, once it has fully hardened into place, is what you actually have. Disturbing the surface while it is still curing — picking, getting it wet, applying acidic products — pulls the grout out of the gaps before it has bonded. The curing time is not optional.
The healing timeline, stage by stage — what is happening under the skin at each point
Days 1–2: Darker, bolder, inflamed — and completely expected
The morning after your procedure, you may wake up to brows that look dramatically thicker and darker than what you saw in the salon mirror. This is the experience that sends people spiralling — the strokes that looked fine the evening before seem to have merged and intensified overnight. What you are seeing is inflammation at work. In the first one to two days after brow embroidery, brows appear darker and bolder than the intended result because the skin is inflamed and pigment is still sitting on and very close to the surface before integration begins. This is a normal inflammatory response, not your final result.
The swelling — even if minor — slightly distorts the shape. The surface pigment adds depth and darkness. Neither of these is permanent. They are your skin doing its job. The colour will not stay this dark. The shape will not stay this heavy. Give it days, not hours.
Days 3–5: Scabbing begins — the skin is actively pushing excess pigment out
By day three, things start to feel a little strange. The brow area tightens. You may notice small flakes or a light crust forming along the strokes. This is scabbing — which sounds alarming but is precisely what healthy healing looks like at this stage. Scabbing typically begins around day three and should resolve by day ten, as the skin’s wound-healing process expels dead cells and the excess surface pigment that did not make it into the dermis.
The temptation to pick is real. Resist it completely. When you lift a scab prematurely, you are not just removing dead skin — you are pulling out pigment that was in the process of bonding to the tissue beneath it. Every picked flake is a gap in your final result. Let them come off on their own timeline.
Days 6–10: Flaking clears, colour looks ghostly — this is normal pigment loss, not failure
This is the stage that generates the most distress, and the most unnecessary second appointments. As the surface scabbing clears, the brows often look startlingly light — almost as if the pigment has disappeared entirely. After one week, brows may look significantly lighter — sometimes fading by 60 to 70 percent — before colour begins to stabilise. What is happening is that a fresh layer of new skin has formed over the treated area, and that new skin is temporarily opaque over the pigment sitting beneath it.
The colour has not gone. It is under a veil of new skin cells that have not yet fully matured and thinned. The pigment is still there. You are just not seeing it clearly yet.
Weeks 2–4: The colour settles — why the true result takes a full skin cell cycle to appear
Skin cells go through a natural renewal process (the technical term is desquamation) on a roughly 28-to-30-day cycle. The healing process takes approximately five to eight days for the surface skin to close, and around 30 days for the colour to fully set once skin cells have completed a cycle. The brows you see at week four are meaningfully different from what you see at day ten, and genuinely different again from what you saw walking out of the salon. The one-month mark is when you can actually assess the result — not before.
This is the timeline reality check that salons do not always communicate clearly enough upfront. If you are at day ten and unhappy, you are not looking at your result yet. You are looking at a work in progress.
Why you lose 40–70% of colour during healing (and what determines how much you keep)
How the skin barrier seals around retained pigment
Colour fades by approximately 40–60% during the healing process, depending on skin type and how well aftercare is followed — and practitioner observations suggest this range can stretch toward 70% in some cases. That number sounds alarming until you understand that it is expected and designed into the process. The touch-up appointment at four to six weeks exists precisely because this loss is anticipated. The goal of the first session is to establish the strokes; the goal of the second is to assess what held and fill in what did not.
The skin seals retained pigment by forming new collagen around the pigment particles — essentially locking them in place within the dermis. This is a slow, cellular process. It cannot be rushed, and it cannot be judged until it is complete.
The factors that reduce retention: picking, sweating, acids, sun exposure
Four things reliably reduce how much pigment survives the healing window. Picking at scabs and flakes mechanically removes pigment before it has bonded. Excessive sweating introduces moisture and bacteria into a healing micro-wound, which can disrupt the skin barrier as it forms. Acid-based skincare products — anything containing AHAs, BHAs, or retinoids — accelerate the skin cell turnover process, which is the very mechanism that expels surface pigment. And UV exposure, both during and after healing, is well-established in tattoo science as a driver of pigment breakdown over time. All four of these factors are within your control during the healing window.
Aftercare explained by mechanism — not just a list of rules
Why keeping brows dry matters during the first healing window
Aftercare for brow embroidery includes keeping brows dry for the first few days — and the reason is mechanical, not arbitrary. Water softens the forming scab and the new tissue beneath it. A softened scab lifts more easily and takes pigment with it. Keeping the area dry gives the surface time to form a protective barrier without interference. Washing your face carefully below the brow line, avoiding steam rooms and pools, and patting rather than rubbing around the area all serve the same purpose: keeping the curing environment stable.
Using a thick, skin-loving balm or ointment post-procedure is consistently recommended by practitioners for good reason — occlusives create a protective layer over the wound that minimises transepidermal water loss (moisture escaping through the skin surface) without introducing moisture from outside. A thin layer of something like plain petroleum jelly or a practitioner-recommended aftercare balm, applied sparingly, helps the skin heal without drying out or cracking.
Why acid exfoliants and active skincare disrupt the process
If you have a solid skincare routine — AHAs, BHAs, a retinoid, a vitamin C serum with low pH — you are exactly the person most likely to accidentally sabotage your brow healing. Not out of negligence, but out of habit. These ingredients work precisely by accelerating skin cell turnover. That is what makes them effective for texture, tone, and fine lines. It is also what makes them destructive to a healing embroidery wound, where the goal is to keep cells in place long enough for pigment to bond. Acids used near the brow area during the first two weeks can chemically exfoliate the new skin forming over the pigment — which means pigment comes up with it. The effect is gradual and invisible until you see the result at four weeks and wonder why retention was poor.
Singapore-specific considerations: sweat, humidity, and UV
Singapore’s climate adds a layer of complication that practitioners in cooler countries do not always account for. With ambient humidity sitting around 80% and a UV index regularly hitting 10 to 12, two specific risks are elevated. Sweat — especially during the first week — can pool in the brow area and introduce bacteria to a still-open micro-wound. High UV exposure accelerates pigment breakdown, an effect well-documented in tattoo science and reasonably inferred for brow embroidery pigments in tropical climates.
The practical answer for the first week is to avoid workouts that generate significant sweat — yes, even that morning run — and to blot rather than wipe if perspiration hits the brow area. Once the surface has fully healed (typically around day ten), daily SPF applied carefully around the brows becomes one of the most useful things you can do for longevity. In this UV environment, skipping sun protection on healed embroidery is how colour fades faster than it should.
The touch-up is not optional — it is how the treatment actually works
What the artist is assessing at four to six weeks and why it cannot be assessed sooner
The touch-up appointment, typically at four to six weeks, is a structural part of the two-step process — not an upsell. By this point, the full skin cell cycle has completed and the retained pigment is visible in its true form. The artist can now see exactly which strokes held, which areas lost pigment entirely, and where colour needs to be deepened or reshaped. Without this assessment, the treatment is genuinely incomplete — not because the first session failed, but because no first session can fully predict individual retention.
Going earlier than four weeks means assessing a result that is not final. The skin is still in transition, colour is still shifting, and any pigment added during that window will behave differently than it would in fully healed skin. The wait is frustrating if your brows look sparse at week two. It is necessary regardless.
One mechanism insight to carry into your healing period
Before your next skincare session during the healing window, scan your routine for any acid-based products — AHAs, BHAs, retinoids, or exfoliating toners — and physically move them off your bathroom shelf for the first two weeks post-procedure. The mechanism is simple: acids accelerate skin cell turnover, which is exactly what disrupts pigment from bonding. This is the one aftercare rule with the clearest mechanistic rationale, and the one most easily violated by experienced skincare users who simply forget their actives are in their routine.
If you are thinking about brow embroidery — or want to compare salons, read verified reviews, and find a practitioner near you in Singapore — Glamingo lists brow embroidery providers with real client reviews across the island. Search brow embroidery salons on Glamingo →

Drop in your comments..